Hi, we all need to display captcha when ever we fill form.
So you can get thousands of captcha example when you search.
But the one i am providing you is interested and easy to implement.
First of all we need to create Http Handler(generic handler) below :
using System;
using System.Linq;
using System.Web;
using System.Drawing;
using System.IO;
using System.Web.SessionState;
namespace YourNamespace
{
public class Captcha : IHttpHandler,IRequiresSessionState
{
#region "ProcessRequest"
public void ProcessRequest(HttpContext context)
{
HttpContext.Current.Response.ContentType = "image/png";
var no = RandomText.GenerateRandomText(3);
//if (context.Session["Captcha"] == null) return;
HttpContext.Current.Session["Captcha"] = no;
//var bmpOut = new Bitmap(200, 50);
var bmpOut = new Bitmap(60, 25);
var g = Graphics.FromImage(bmpOut);
g.InterpolationMode = System.Drawing.Drawing2D.InterpolationMode.HighQualityBicubic;
g.FillRectangle(Brushes.White, 0, 0, 60, 23);
g.DrawString(HttpContext.Current.Session["Captcha"].ToString(), new Font("Verdana", 18), new SolidBrush(Color.Gray), 0, 0);
var ms = new MemoryStream();
bmpOut.Save(ms, System.Drawing.Imaging.ImageFormat.Png);
var bmpBytes = ms.GetBuffer();
bmpOut.Dispose();
ms.Close();
context.Response.BinaryWrite(bmpBytes);
context.Response.End();
}
#endregion
#region "Properties"
public bool IsReusable
{
get
{
return true;
}
}
#endregion
}
public static class RandomText
{
#region "GenerateRandomText"
public static string GenerateRandomText(int textLength)
{
const string chars = "ABCDEFGHIJKLMNPQRSTUVWXYZ23456789";
var random = new Random();
var result = new string(
Enumerable.Repeat(chars, textLength)
.Select(s => s[random.Next(s.Length)])
.ToArray());
return result;
}
#endregion
}
}
Alert creating http handler now we need to create the .aspx part
where we will generate this image :
<!-- This part will placed in .aspx -->
<div class="float_left">
<img src="/Captcha.ashx?" id="img1" alt="" />
</div>
<div class="float_left paddingtop3">
<a href="javascript:void(0);" class="message" id="newchapta">(Can’t see the image?)</a>
</div>
Now in the same page, to change change content or re-generate image again on hyper link click,add the following code :
<script type="text/javascript">
// with this method this captcha gets chaned on client side ! have fun
$(function(e) {
$("#newchapta").click(function(e) {
var imgNew = $("#imgCode");
d = new Date();
imgNew.attr("src", 'Captcha.ashx?' + d.getTime());
});
});
</script>
Now on the server side we can match input entered by user like following code snippet :
<!-- For code behind here you can check text value entered by user where captcha.Text is the text box value -->
if (HttpContext.Session["Captcha"] != null)
{
if (HttpContext.Session["Captcha"].ToString().ToLower() != captcha.Text.ToLower())
{
error = "The digits you entered do not match the digits in the image.";
}
}
<!-- Till here -->
Friday, May 21, 2010
Create Polling System with Asp.net & jQuery
Hi,
You can find many polling system on internet that are working .But here is the
one which is merged with jQuery poll. You can use this with update panel and with out update panel as well.
At first Create the database using the following script :
SET ANSI_NULLS ON
GO
SET QUOTED_IDENTIFIER ON
GO
CREATE TABLE [dbo].[Poll](
[PollID] [int] IDENTITY(1,1) NOT NULL,
[Name] [nvarchar](400) COLLATE SQL_Latin1_General_CP1_CI_AS NOT NULL,
[Published] [bit] NOT NULL,
[CreatedOn] [datetime] NULL
)
script for poll question answer:
SET ANSI_NULLS ON
GO
SET QUOTED_IDENTIFIER ON
GO
CREATE TABLE [dbo].[YourPollAnswer](
[PollAnswerID] [int] IDENTITY(1,1) NOT NULL,
[PollID] [int] NOT NULL,
[PollAnswerName] [nvarchar](400) COLLATE SQL_Latin1_General_CP1_CI_AS NOT NULL,
[Count] [int] NOT NULL,
[DisplayOrder] [int] NOT NULL,
[CreatedOn] [datetime] NULL
)
Stored Procedures for selecting and updating counts/votes
update YourPollAnswer set [Count] = ([Count]+1) where PollAnswerID = @PollAnswerID and PollID = @PollID
select PollAnswerName,[Count],PollAnswerID,PollID,DisplayOrder,CreatedOn from YourPollAnswer where PollID=@PollID
------------------------
Now create the aspx page :
------------------------------------------------------------------------
<asp:ScriptManager ID="scrMgr" runat="server"></asp:ScriptManager>
<table width="90%" border="0" cellspacing="0" cellpadding="0">
<tr>
<td>
<asp:UpdatePanel ID="upPanelPoll" RenderMode="Block" runat="server">
<ContentTemplate>
<div>
<div id="poll-container">
<span class="black12"><strong>
<asp:Label ID="lblQuestion" runat="server"></asp:Label></strong></span><br />
<p>
<asp:RadioButtonList ID="rblPollAnswers" CssClass="black12" runat="server" DataTextField="PollAnswerName"
DataValueField="PollAnswerID">
</asp:RadioButtonList>
<asp:Button ID="btnsubmit" runat="server" Text="Vote" OnClientClick="javascript:return CheckAnswer();"
class="vote_button" OnClick="btnsubmit_Click" />
</p>
</div>
<div id="poll-results" style="display: none;">
</div>
</div>
</ContentTemplate>
</asp:UpdatePanel>
</td>
</tr>
<tr>
<td>
</td>
</tr>
</table>
<script type="text/javascript">
function CheckAnswer()
{
var all=document.getElementsByTagName("input");
var check=0;
for(i=0;i<all.length;i++)
{
if(all[i].type == "radio" && all[i].checked == true)
{
check=0;
break;
}
else
{
check=1;
}
}
if(check == 1)
{
alert("Please select answer before voting.");
return false;
}
}
</script>
------------------------------------------------------------------------
Now, Create an JS file which will contains the necessary JavaScript functions :
------------------------------------------------------------------------
var OPT_ID = 0;
var OPT_TITLE = 1;
var OPT_VOTES = 2;
var votedID;
function animateResults() {
$("#poll-results div").each(function() {
var percentage = $(this).next().text();
$(this).css({ width: "0%" }).animate({
width: percentage
}, 'slow');
});
}
$("#btnshowresult").click(function() {
// alert('show result');
$("#divfill").fadeOut('normal', function() {
$(this).css("display", "none");
$("#divresult").fadeIn('normal', function() {
$("#divresult").css("display", "block");
});
});
});
$("#btnshowpoll").click(function() {
//alert('Show poll');
$("#divresult").fadeOut('normal', function() {
$("#divresult").css("display", "none");
$("#divfill").fadeIn('normal', function() {
$("#divfill").css("display", "block");
});
});
});
function loadResults(data) {
//alert('here');
var total_votes = 0;
var percent;
for (id in data) {
total_votes = total_votes + parseInt(data[id][OPT_VOTES]);
}
//alert(total_votes);
var results_html = "Poll Results\n
Total Votes : " + total_votes + "
<input type='button' class='voteagain_button' style='margin-left:20px;' id='btnret' value='Vote Again' onclick='backtopoll()' />\n";
$("#poll-container").fadeOut('normal', function() {
$(this).css("display", "none");
$("#poll-results").empty();
$("#poll-results").append(results_html).fadeIn('normal', function() {
$("#poll-results").css("display", "block");
animateResults();
});
});
}
function backtopoll() {
$("#poll-results").fadeOut('normal', function() {
$("#poll-results").css("display", "none");
$("#poll-container").fadeIn('normal', function() {
$("#poll-container").css("display", "block");
});
});
}
You can find many polling system on internet that are working .But here is the
one which is merged with jQuery poll. You can use this with update panel and with out update panel as well.
At first Create the database using the following script :
SET ANSI_NULLS ON
GO
SET QUOTED_IDENTIFIER ON
GO
CREATE TABLE [dbo].[Poll](
[PollID] [int] IDENTITY(1,1) NOT NULL,
[Name] [nvarchar](400) COLLATE SQL_Latin1_General_CP1_CI_AS NOT NULL,
[Published] [bit] NOT NULL,
[CreatedOn] [datetime] NULL
)
script for poll question answer:
SET ANSI_NULLS ON
GO
SET QUOTED_IDENTIFIER ON
GO
CREATE TABLE [dbo].[YourPollAnswer](
[PollAnswerID] [int] IDENTITY(1,1) NOT NULL,
[PollID] [int] NOT NULL,
[PollAnswerName] [nvarchar](400) COLLATE SQL_Latin1_General_CP1_CI_AS NOT NULL,
[Count] [int] NOT NULL,
[DisplayOrder] [int] NOT NULL,
[CreatedOn] [datetime] NULL
)
Stored Procedures for selecting and updating counts/votes
update YourPollAnswer set [Count] = ([Count]+1) where PollAnswerID = @PollAnswerID and PollID = @PollID
select PollAnswerName,[Count],PollAnswerID,PollID,DisplayOrder,CreatedOn from YourPollAnswer where PollID=@PollID
------------------------
Now create the aspx page :
------------------------------------------------------------------------
<asp:ScriptManager ID="scrMgr" runat="server"></asp:ScriptManager>
<table width="90%" border="0" cellspacing="0" cellpadding="0">
<tr>
<td>
<asp:UpdatePanel ID="upPanelPoll" RenderMode="Block" runat="server">
<ContentTemplate>
<div>
<div id="poll-container">
<span class="black12"><strong>
<asp:Label ID="lblQuestion" runat="server"></asp:Label></strong></span><br />
<p>
<asp:RadioButtonList ID="rblPollAnswers" CssClass="black12" runat="server" DataTextField="PollAnswerName"
DataValueField="PollAnswerID">
</asp:RadioButtonList>
<asp:Button ID="btnsubmit" runat="server" Text="Vote" OnClientClick="javascript:return CheckAnswer();"
class="vote_button" OnClick="btnsubmit_Click" />
</p>
</div>
<div id="poll-results" style="display: none;">
</div>
</div>
</ContentTemplate>
</asp:UpdatePanel>
</td>
</tr>
<tr>
<td>
</td>
</tr>
</table>
<script type="text/javascript">
function CheckAnswer()
{
var all=document.getElementsByTagName("input");
var check=0;
for(i=0;i<all.length;i++)
{
if(all[i].type == "radio" && all[i].checked == true)
{
check=0;
break;
}
else
{
check=1;
}
}
if(check == 1)
{
alert("Please select answer before voting.");
return false;
}
}
</script>
------------------------------------------------------------------------
Now, Create an JS file which will contains the necessary JavaScript functions :
------------------------------------------------------------------------
var OPT_ID = 0;
var OPT_TITLE = 1;
var OPT_VOTES = 2;
var votedID;
function animateResults() {
$("#poll-results div").each(function() {
var percentage = $(this).next().text();
$(this).css({ width: "0%" }).animate({
width: percentage
}, 'slow');
});
}
$("#btnshowresult").click(function() {
// alert('show result');
$("#divfill").fadeOut('normal', function() {
$(this).css("display", "none");
$("#divresult").fadeIn('normal', function() {
$("#divresult").css("display", "block");
});
});
});
$("#btnshowpoll").click(function() {
//alert('Show poll');
$("#divresult").fadeOut('normal', function() {
$("#divresult").css("display", "none");
$("#divfill").fadeIn('normal', function() {
$("#divfill").css("display", "block");
});
});
});
function loadResults(data) {
//alert('here');
var total_votes = 0;
var percent;
for (id in data) {
total_votes = total_votes + parseInt(data[id][OPT_VOTES]);
}
//alert(total_votes);
var results_html = "Poll Results\n
- \n";
for (id in data) {
percent = Math.round((parseInt(data[id][OPT_VOTES]) / parseInt(total_votes)) * 100);
if (data[id][OPT_ID] !== votedID) {
results_html = results_html + "\n";
} else {
results_html = results_html + "\n";
}
}
results_html = results_html + "
Total Votes : " + total_votes + "
<input type='button' class='voteagain_button' style='margin-left:20px;' id='btnret' value='Vote Again' onclick='backtopoll()' />\n";
$("#poll-container").fadeOut('normal', function() {
$(this).css("display", "none");
$("#poll-results").empty();
$("#poll-results").append(results_html).fadeIn('normal', function() {
$("#poll-results").css("display", "block");
animateResults();
});
});
}
function backtopoll() {
$("#poll-results").fadeOut('normal', function() {
$("#poll-results").css("display", "none");
$("#poll-container").fadeIn('normal', function() {
$("#poll-container").css("display", "block");
});
});
}

Wednesday, May 5, 2010
Following the gurus
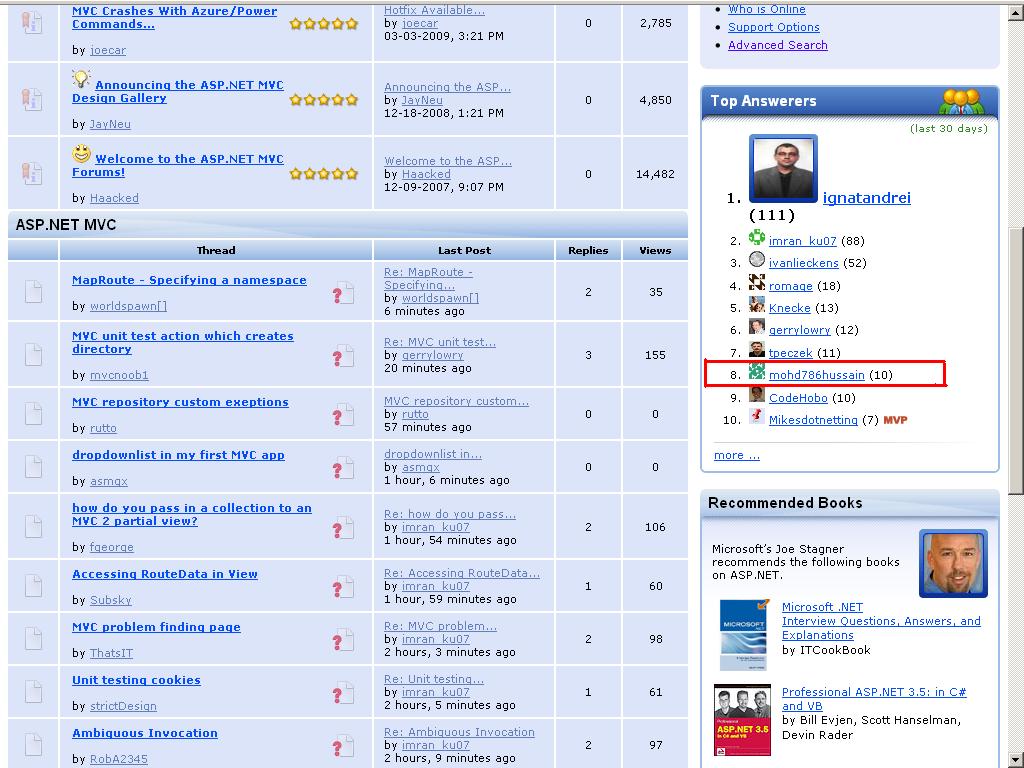
Following the path set by DotNet Gurus.... I am trying my best to contribute my thoughts and ideas to help people working with Asp.Net. One small achievement on 6th may 2010 is to get into Top 10.
Monday, June 29, 2009
Reduse image height/width without saving to hard disk
Hi,
if you are uploading the image with flie type control,and you want to reduce image size without saving the original image on the hard disk,THen you can do it like the following (this is all code behind part) :
on the button click write the code:
protected void btnSubmit_Click(object sender, EventArgs e)
{
Stream s = Request.Files["id of the file control"].InputStream;
Size size = new Size(); // size class is included in using //System.Drawing.Imaging; namespace
size = GetBigDimensions();
size = GetBigDimensions();
System.Drawing.Bitmap img = (Bitmap)System.Drawing.Bitmap.FromStream(s);
if (img.Width != size.Width || img.Height != size.Height )
{
img = (System.Drawing.Bitmap)GetThumb(new Bitmap(img), size.Width, size.Height, true, Color.White);
}
SaveImage(img, Server.MapPath("~/path of the folder where you want to store the image" + imagename variable));
}
public Size GetBigDimensions()
{
Size s = new Size(302, 204);// you can set height and width what you want
return s;
}
public Image GetThumb(Image _image, int w, int h, bool HiQuality, Color bgColor)
{
if (_image == null)
return null;
Bitmap bmp = new Bitmap(w, h);
Image img = (Image)bmp;
System.Drawing.Graphics g = System.Drawing.Graphics.FromImage((Image)img);
g.Clear(bgColor);
if (_image.Width > w
|| _image.Height > h)
{
if (HiQuality)
{
g.CompositingQuality = CompositingQuality.HighQuality;
g.PixelOffsetMode = PixelOffsetMode.HighQuality;
g.SmoothingMode = SmoothingMode.HighQuality;
g.InterpolationMode = System.Drawing.Drawing2D.InterpolationMode.High;
}
else
g.InterpolationMode = System.Drawing.Drawing2D.InterpolationMode.Low;
double ratio = Math.Min(1 / ((double)_image.Width / w), 1 / ((double)_image.Height / h));
float posX = (w / 2 - (_image.Width * (float)ratio) / 2);
float posY = (h / 2 - (_image.Height * (float)ratio) / 2);
g.DrawImage(_image, posX, posY, (float)_image.Width * (float)ratio, (float)_image.Height * (float)ratio);
}
else
{
int posX2 = (int)(((double)w / 2.0) - ((double)_image.Width / 2.0));
int posY2 = (int)(((double)h / 2.0) - ((double)_image.Height / 2.0));
g.DrawImage(_image, posX2, posY2, _image.Width, _image.Height);
}
g = null;
return img;
}
public void SaveImage(System.Drawing.Image img, string path)
{
string Format = path.Substring(path.IndexOf(".") + 1);
switch (Format.ToLower())
{
case "gif":
case "jpg":
{
EncoderParameters eps = new EncoderParameters(1);
eps.Param[0] = new EncoderParameter(System.Drawing.Imaging.Encoder.Quality, 90L);
ImageCodecInfo ici = GetEncoderInfo("image/jpeg");
img.Save(path, ici, eps);
} break;
default:
img.Save(path);
break;
}
}
private static ImageCodecInfo GetEncoderInfo(String mimeType)
{
int j;
ImageCodecInfo[] encoders;
encoders = ImageCodecInfo.GetImageEncoders();
for (j = 0; j < encoders.Length; ++j)
{
if (encoders[j].MimeType == mimeType)
return encoders[j];
} return null;
}
and you are done with it ,Its that easy.Using the above we can also reduce of image shriking.
Friday, June 12, 2009
Show Error/Succcess Messages like gmail,yahoo mail through JQuery
Hi All,
Recently i have applied new message system like what we have seen in gmail and yahoo , when we delete the message,the message come for 4-5 second and after that it just fade out. First i was thinking it is going to be though.But after i implement it,i was not all that diffcult.So below is the solution .
/******************************************************************/
First we have to place a div in the master page and have to assign id to it.
<div id="msgdiv"></div>
Make the body of the master page runat="server" and have a id for it as well.
<body id="MainBody" runat="server">
we also have to add jquery file of 1.2.1min.js file :
<script src="js/jquery-1.2.1.min.js" type="text/JavaScript"></script>
Now lets say you want to show message on deleting of message from inbox.
So add the following two functions in JavaScript:
function DeleteFromInbox() {
document.getElementById("msgdiv").className = "quick-alert";
document.getElementById("msgdiv").innerHTML = "<table border='0' align='center' cellpadding='0' cellspacing='0'><tr><td><img src='images/checked_new_icon.jpg' alt='' /></td><td width='8'> </td><td>message deleted from inbox successfully.</td></tr></table>";
setTimeout("FadeOutDiv()", 2000);
}
function ErrorInDeleteing() {
document.getElementById("msgdiv").className = "quick-alert";
document.getElementById("msgdiv").innerHTML = "<table border='0' align='center' cellpadding='0' cellspacing='0'><tr><td><img src='images/checked_new_icon.jpg' alt='' /></td><td width='8'> </td><td>message was not deleted from inbox.</td></tr></table>";
setTimeout("FadeOutDiv()", 2000);
}
function FadeOutDiv() {
$(".quick-alert").fadeOut("slow", function() {
$(".quick-alert").remove();
});
}
we should have following in our css file :
.quick-alert
{
width:66%;
background:#EE5A1E; font-family:Arial, Helvetica, sans-serif; font-size:13px; color:#fff; font-weight:bold; text-align:center; border:1px solid #727272; padding:5px; margin:3px;margin-left:100px;
}
here you can set BG-color and font size according to your design.
Now finally on the click of the delete button we have to call this function from server-side :
protected void btnDelete_Click(object sender, ImageClickEventArgs e)
{
int i = DeleteFromInbox();
// after this we can return any variable knowing if the message is deleted or not
HtmlGenericControl MasterPageBodyTag = (HtmlGenericControl)this.Page.Master.FindControl("MainBody");
if (i>0)
{
MasterPageBodyTag.Attributes.Add("Onload", "javascript:DeleteFromInbox();");
}
else
{
MasterPageBodyTag.Attributes.Add("Onload", "javascript:ErrorInDeleteing();");
}
}
/******************************************************************/
Monday, June 1, 2009
PNG images problem for ie6
Hi,
Today i have a problem regarding the png images dot displaying properly in IE6 browser.
Then i find some of the best solution regarding this they are listed below :
1. IF YOU ARE USING PNG IMAGE AS SOURCE IMAGE :
if you are using png image like the following :
< img src=".png" / >
then all you have to do is to place the following code in your head section of the page :
2. IF YOU ARE USING PNG IMAGE IN Css as Background image :
if you are setting the png images in your css file as background image then the follwoing is the solution :
.tab {
background-image:url(images/tab_b.png);
background-repeat:repeat-x;
background-position:0 0;
height: 42px;
position: relative;
top: 0;
z-index: 999;
}
then you can use the following in bold to hack the png for ie6 and you done
.tab {
background-image:url(images/tab_b.png);
background-repeat:repeat-x;
background-position:0 0;
height: 42px;
position: relative;
top: 0;
z-index: 999;
_background-image: none; _filter:progid:DXImageTransform.Microsoft.AlphaImageLoader(src=images/tab_b.png, sizingMethod='scale');
}
3. If There are png images in both your css and page then you can use the follwing script
to correct ong effect :
var bgsleight = function() {
function addLoadEvent(func) {
var oldonload = window.onload;
if (typeof window.onload != 'function') {
window.onload = func;
} else {
window.onload = function() {
if (oldonload) {
oldonload();
}
func();
}
}
}
function fnLoadPngs() {
var rslt = navigator.appVersion.match(/MSIE (\d+\.\d+)/, '');
var itsAllGood = (rslt != null && Number(rslt[1]) >= 5.5);
for (var i = document.all.length - 1, obj = null; (obj = document.all[i]); i--) {
if (itsAllGood && obj.currentStyle.backgroundImage.match(/\.png/i) != null) {
fnFixPng(obj);
obj.attachEvent("onpropertychange", fnPropertyChanged);
}
}
}
function fnPropertyChanged() {
if (window.event.propertyName == "style.backgroundImage") {
var el = window.event.srcElement;
if (!el.currentStyle.backgroundImage.match(/transparent\.gif/i)) {
var bg = el.currentStyle.backgroundImage;
var src = bg.substring(5,bg.length-2);
el.filters.item(0).src = src;
el.style.backgroundImage = "url(blank.gif)";
}
}
}
function fnFixPng(obj) {
var bg = obj.currentStyle.backgroundImage;
var src = bg.substring(5,bg.length-2);
var sizingMethod = (obj.currentStyle.backgroundRepeat == "no-repeat") ? "crop" : "scale";
obj.style.filter = "progid:DXImageTransform.Microsoft.AlphaImageLoader(src='" + src + "', sizingMethod='" + sizingMethod + "')";
obj.style.backgroundImage = "url(blank.gif)";
}
return {
init: function() {
if (navigator.platform == "Win32" && navigator.appName == "Microsoft Internet Explorer" && window.attachEvent) {
addLoadEvent(fnLoadPngs);
}
}
}
}();
bgsleight.init();
place the above code in js file and set the path of the file in your page.Also place a blank.gif file in the same directory where the .js file is.
You can get image below :
Subscribe to:
Posts (Atom)
